(929) 282-5666 Mon–Fri 7 AM–6 PM · Sat 7 AM–3 PM

Rojas Trailer Repair LLC Call

Our Work — Before & After

Real repairs from our yard, photographed before and after. Slide the bar across each photo to compare.

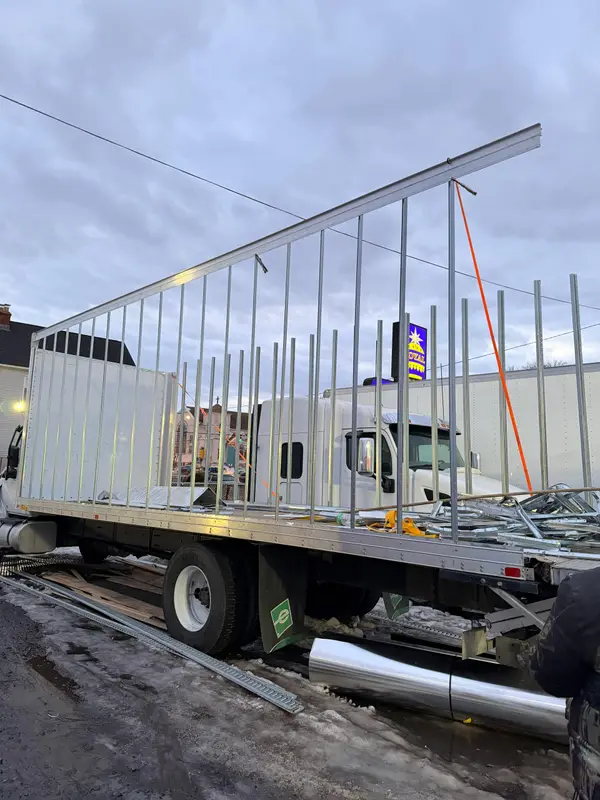
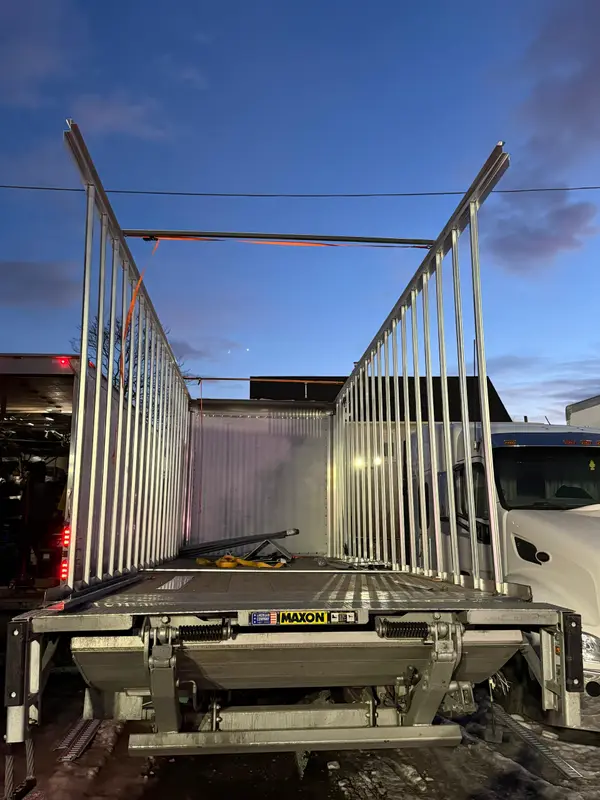
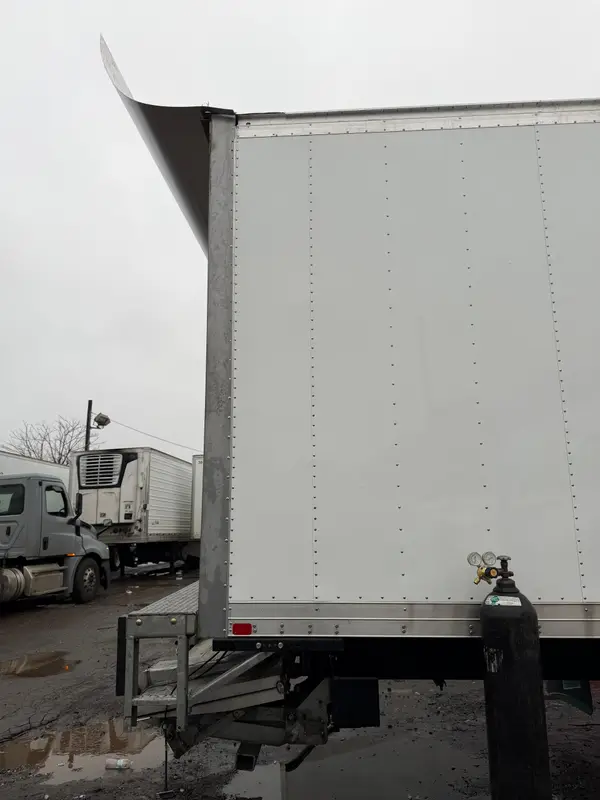
Full box body rebuild

After: the same box truck rebuilt, with new walls, roof and interior, seen from the back with the liftgate down. Before: the back of a box truck with the roof and side wall torn open, seen from behind the liftgate.

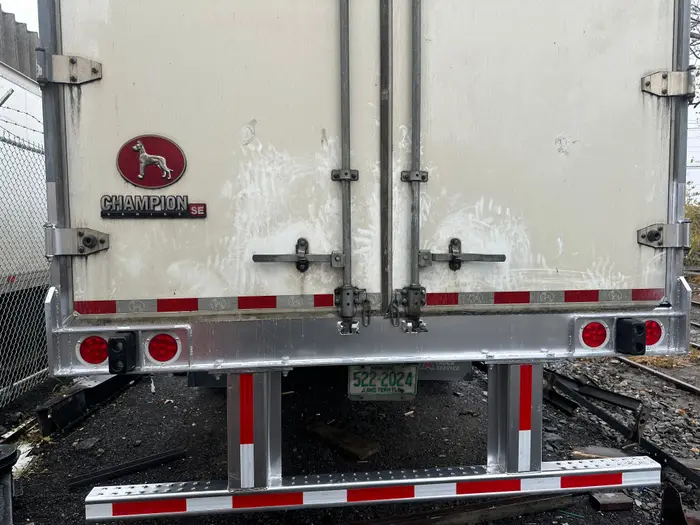
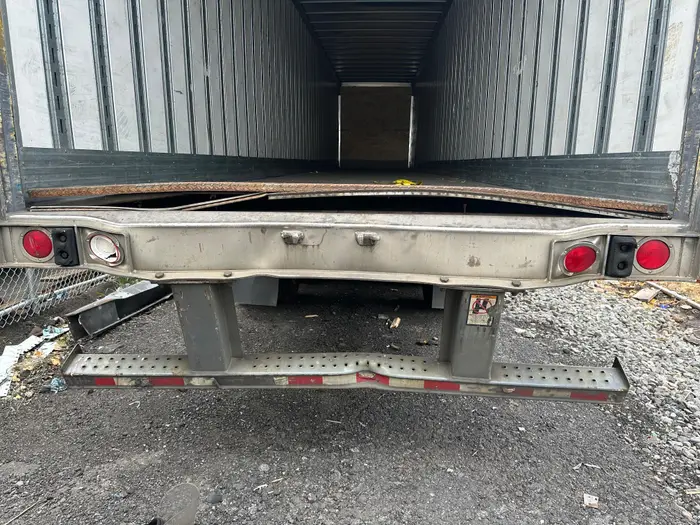
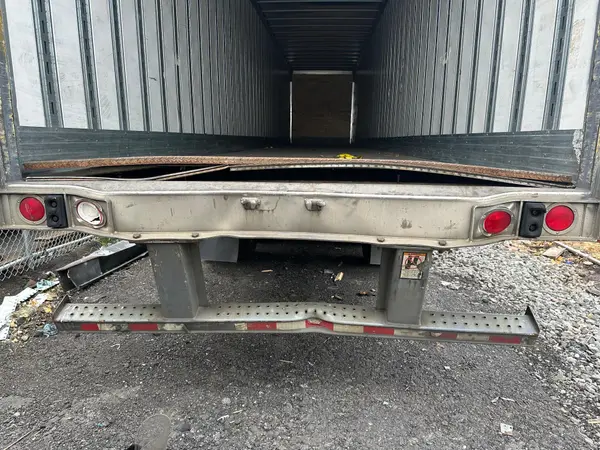
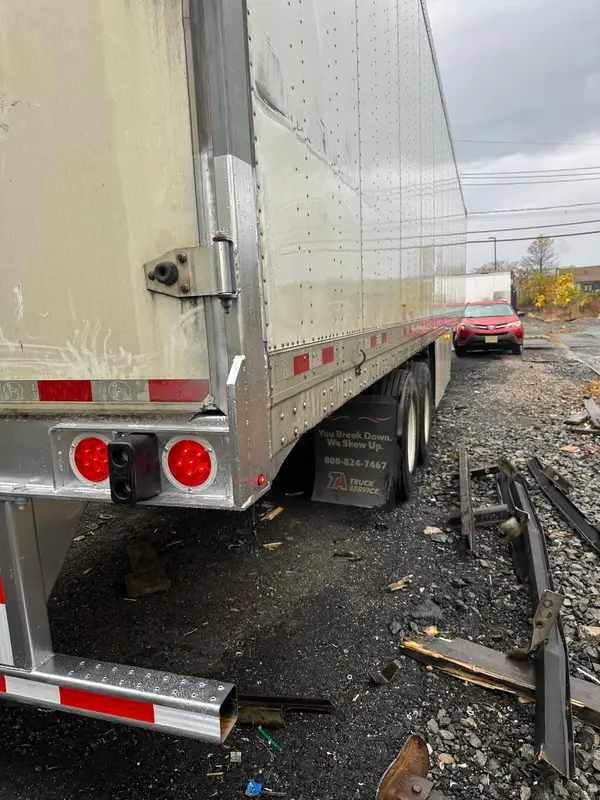
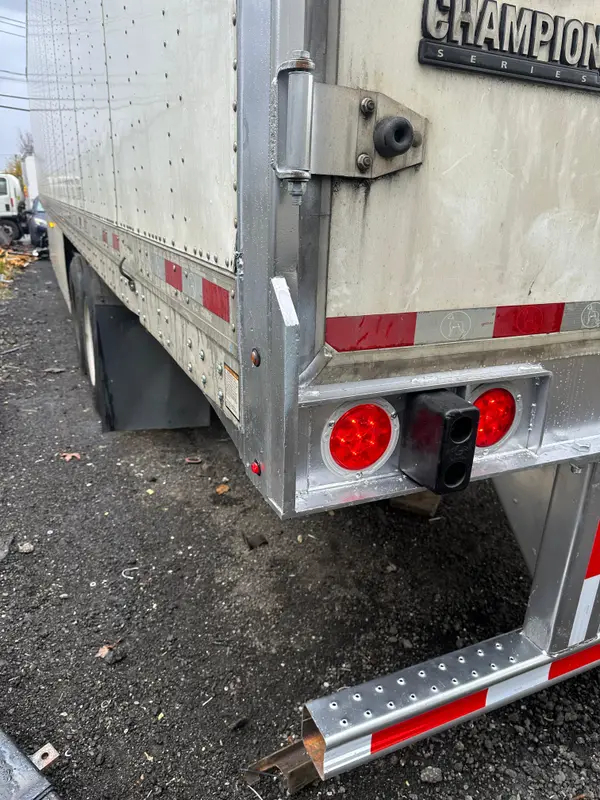
Rear end rebuild — Champion SE

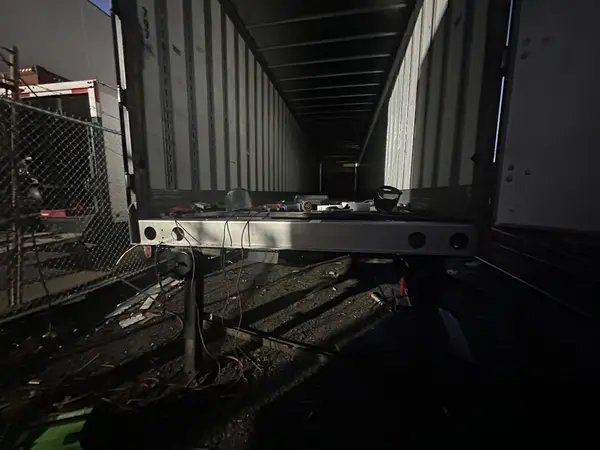
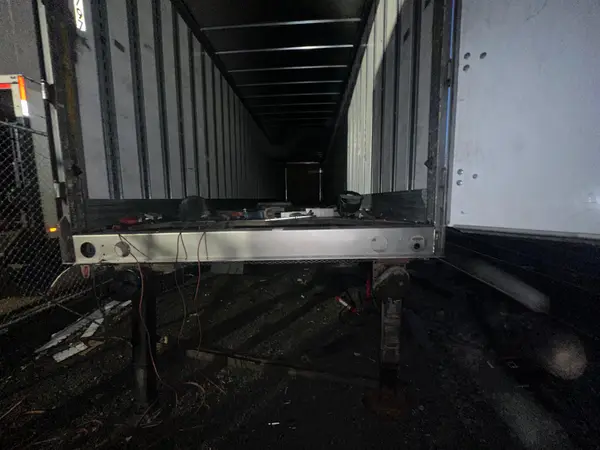
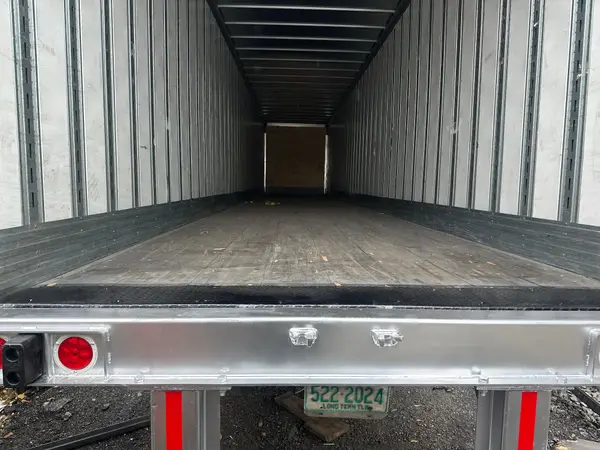
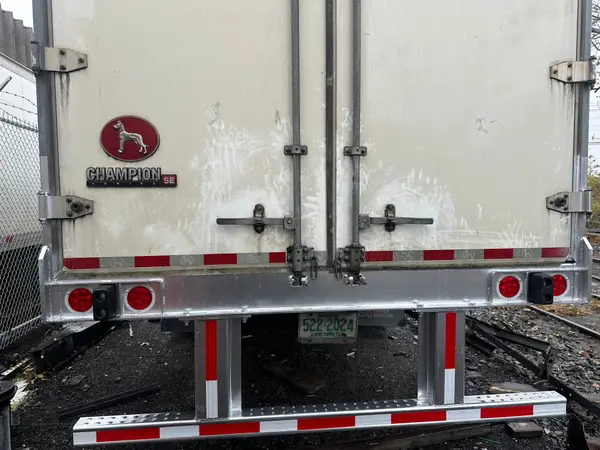
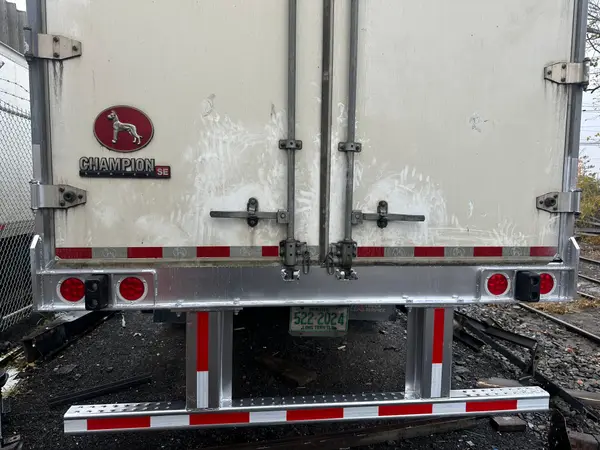
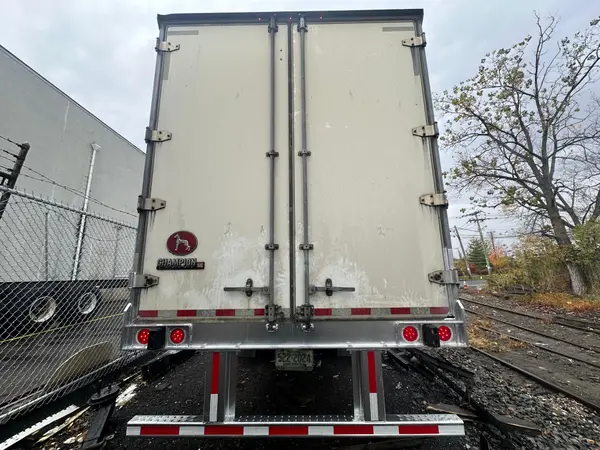
After: the rebuilt rear end with the CHAMPION SE badge, a new sill, ICC bumper and lights. Before: a bent rear sill, broken ICC bumper and damaged lights.

More photos from the yard

Before & after gallery

56 repairs. Tap a photo to compare before and after.

Rebuilds, step by step

Four big jobs, photographed from start to finish. Scroll each row to see the steps.

Box truck: bare frame to finished box

February 11–20, 2026 · 15 steps

  1. Aluminium post frame on the truck, front wall in place, green-logo mudflap, frame material piled at rear. 1 Before
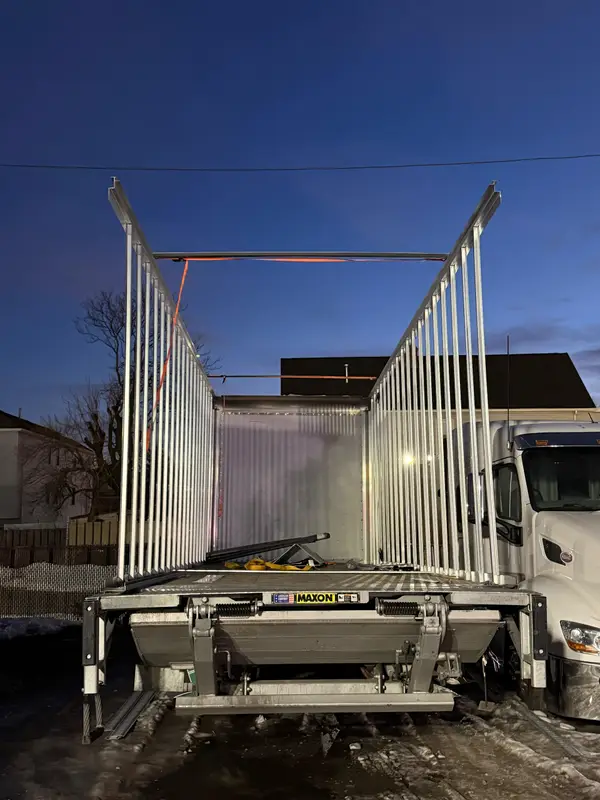
  2. Rear view of bare aluminium frame, no side panels or roof, MAXON liftgate. 2 Teardown
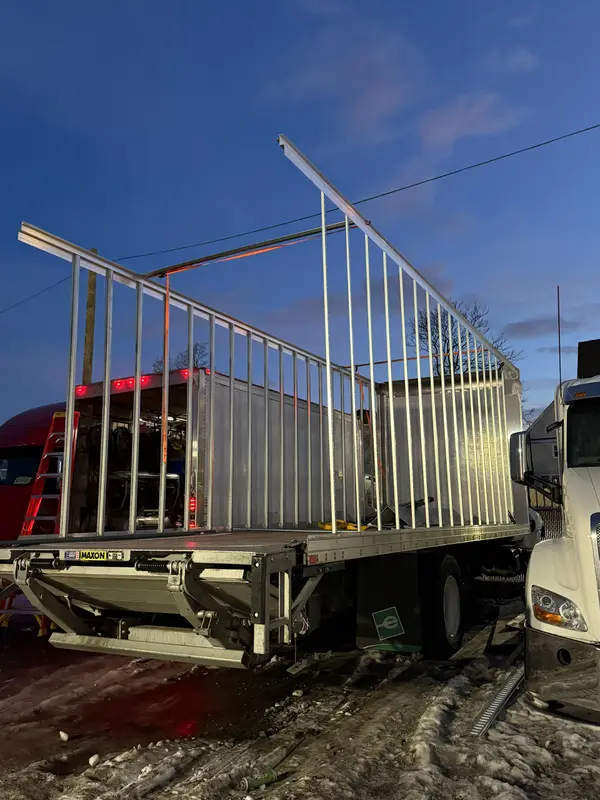
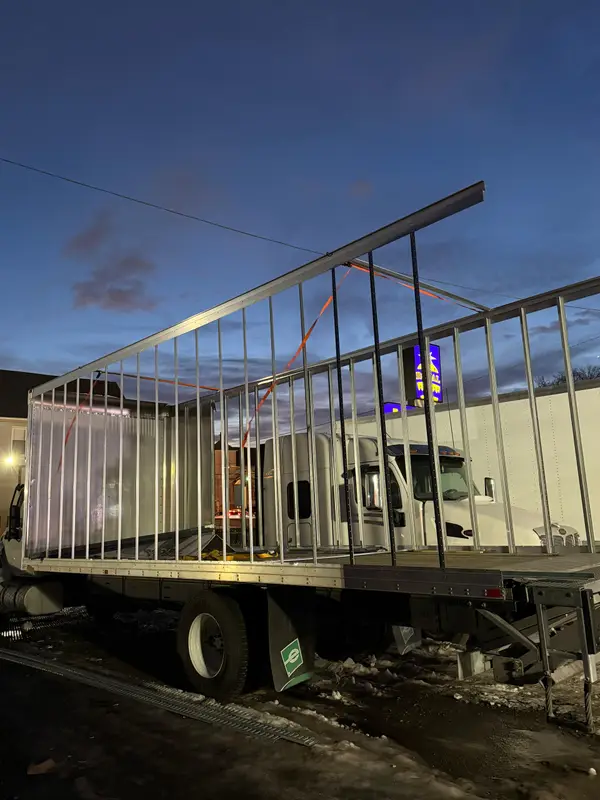
  3. Rear three-quarter of bare frame, MAXON liftgate and green-logo mudflap both visible. 3 Teardown
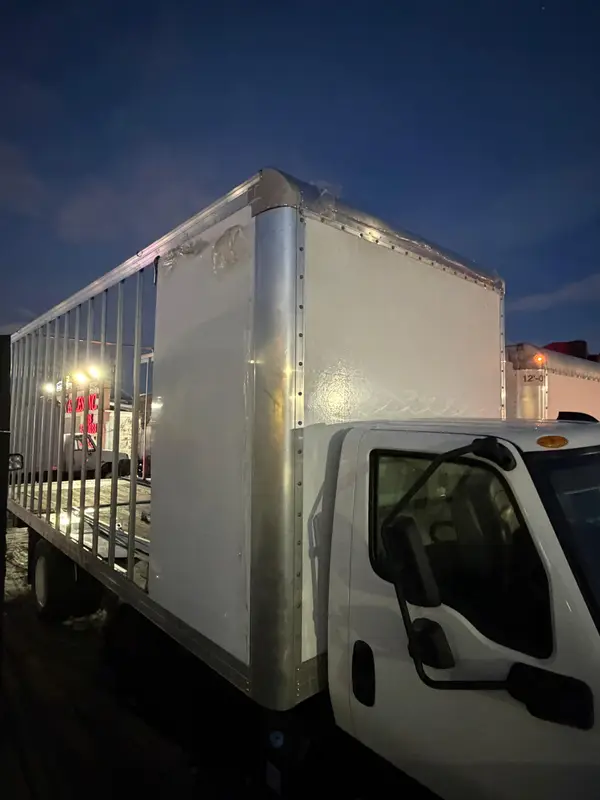
  4. Front section paneled, rear still open frame. 4 In progress
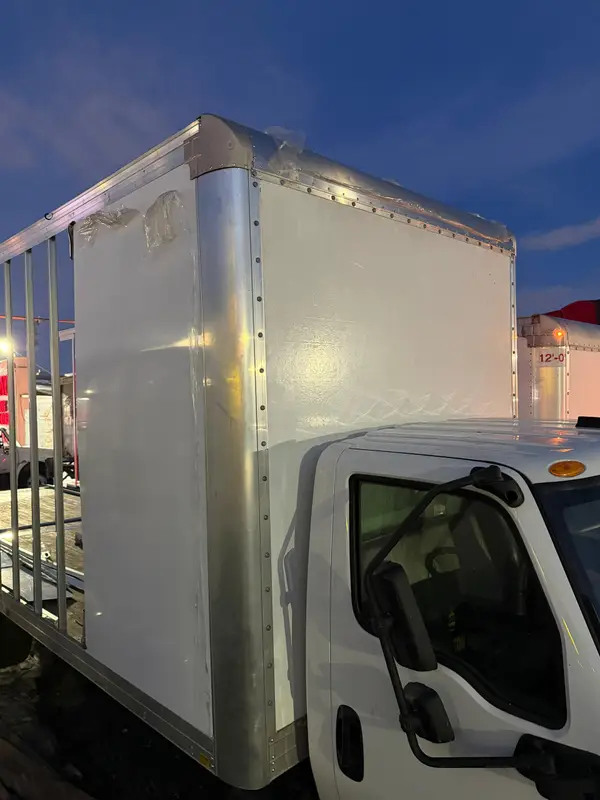
  5. Front box section paneled: close front-corner view, polished corner post, rear still frame. 5 In progress
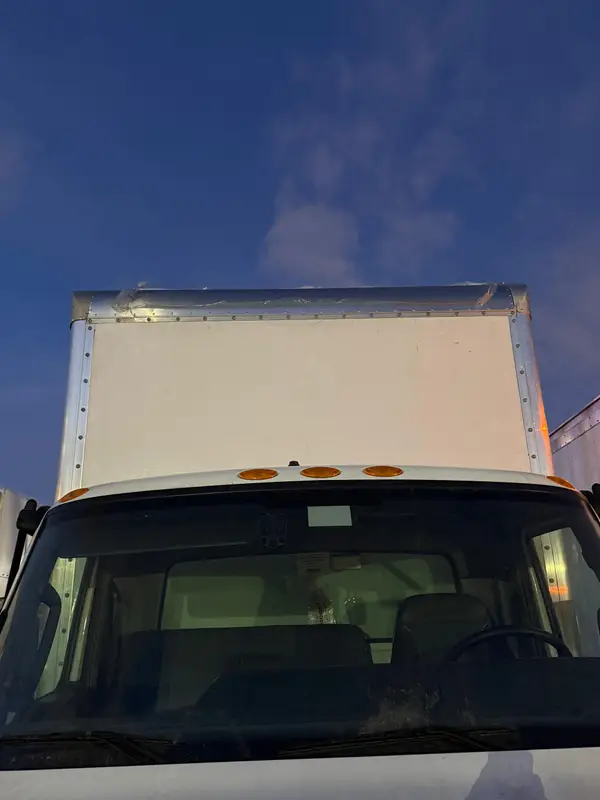
  6. Head-on view over the cab: nose panel fitted with aluminium corner caps. 6 In progress
  7. Rear view of bare frame from the other side, MAXON liftgate, orange strap across roof line. 7 Teardown
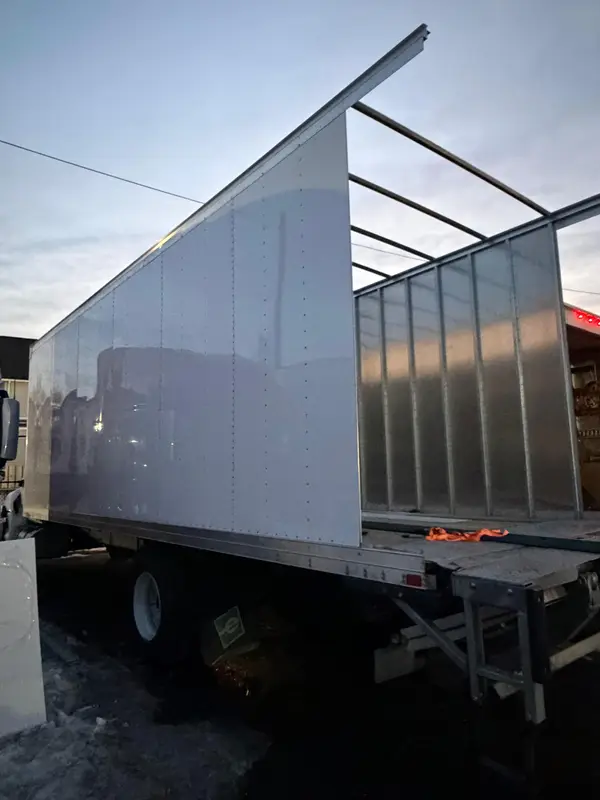
  8. Side view of bare frame on the truck, green-logo mudflap, top rail being set. 8 Teardown
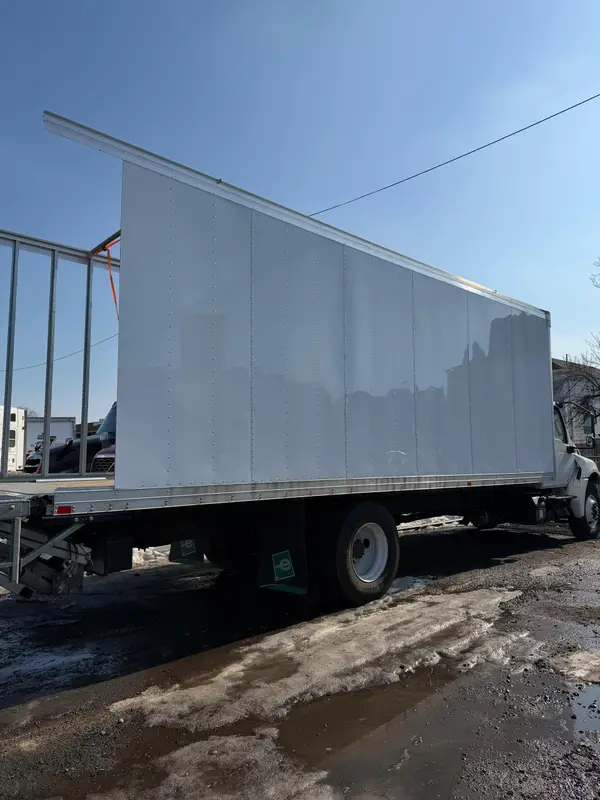
  9. One side fully paneled in white, rear posts still open at the back. 9 In progress
  10. Opposite wall paneled in daylight (gloss white sheets), green-logo mudflap, rear frame still open, no roof. 10 In progress
  11. Walls up, roof still open: roof bows in place with no roof skin, green mudflap at rear. 11 In progress
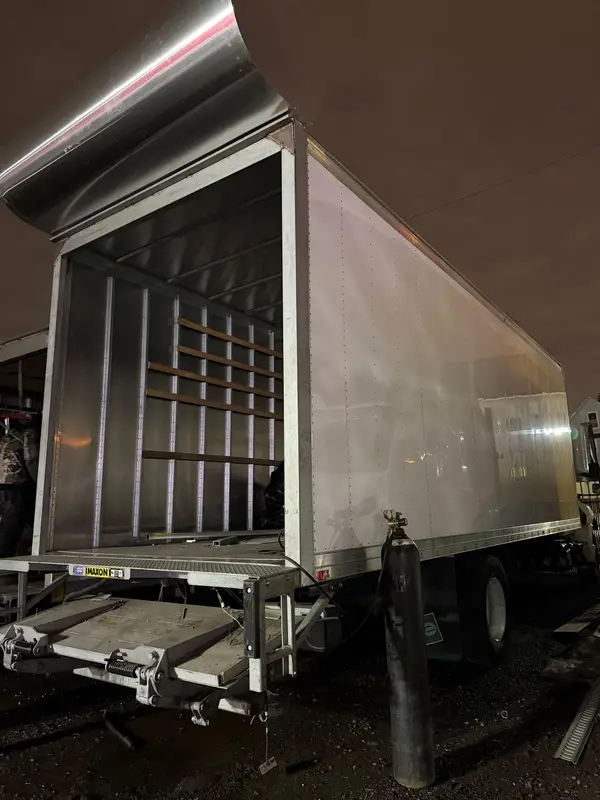
  12. Night rear three-quarter: roof skin fitted, interior posts + wood slat rails visible, MAXON liftgate. 12 Finishing
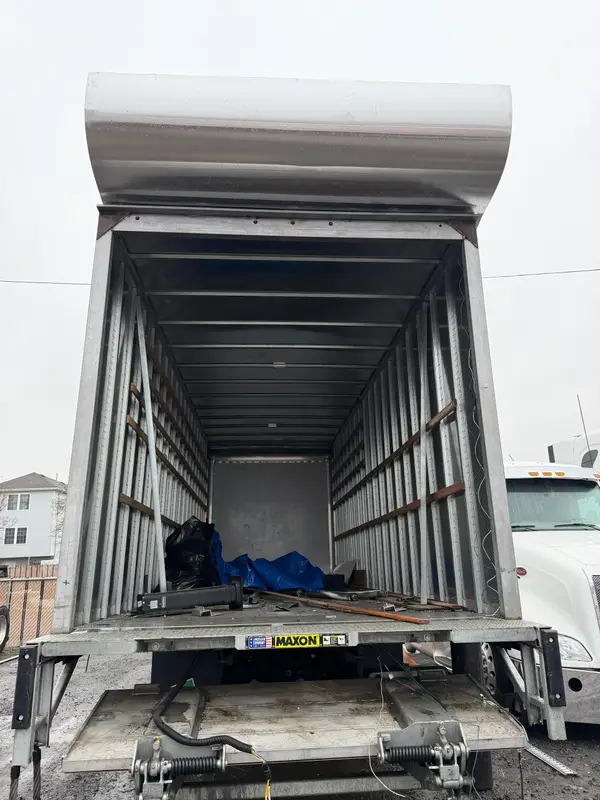
  13. Rear view into the finished box: roof, interior and MAXON liftgate complete. 13 After
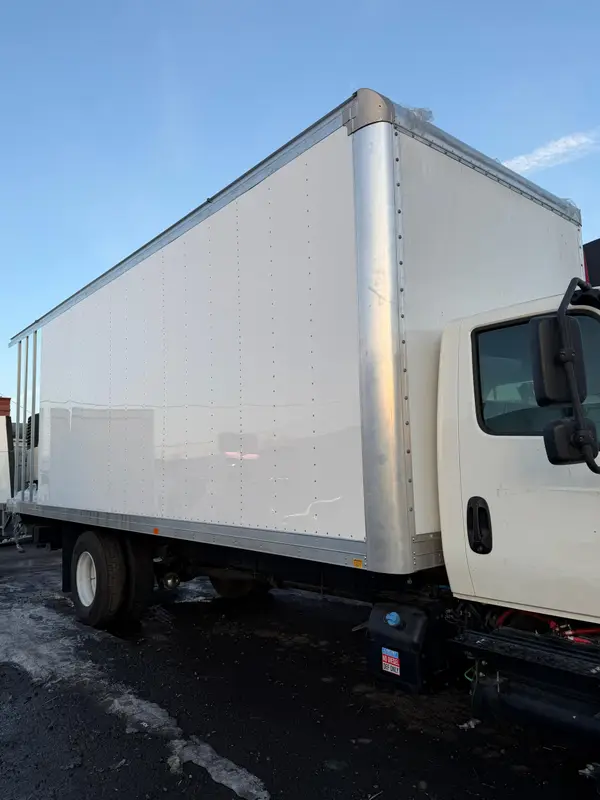
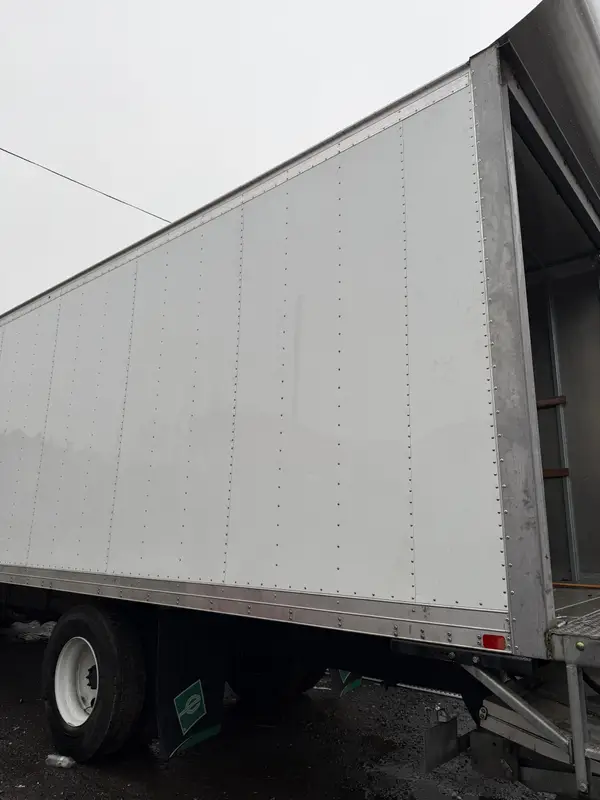
  14. Finished clean white side panel, same green-logo mudflap. 14 After
  15. Rear three-quarter of the finished white box, liftgate platform down. 15 After

Champion SE: rear sill and ICC bumper rebuild

November 6–10, 2025 · 21 steps

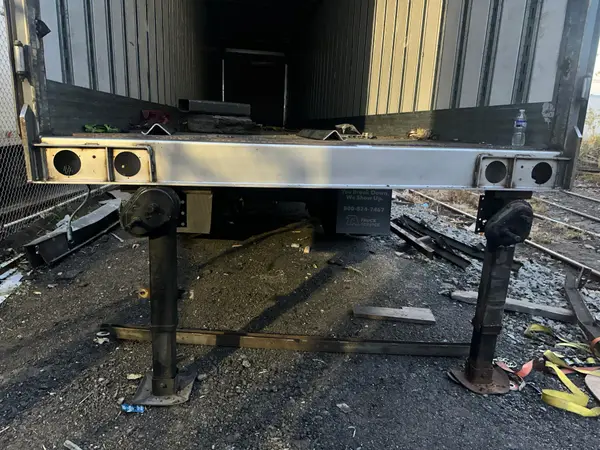
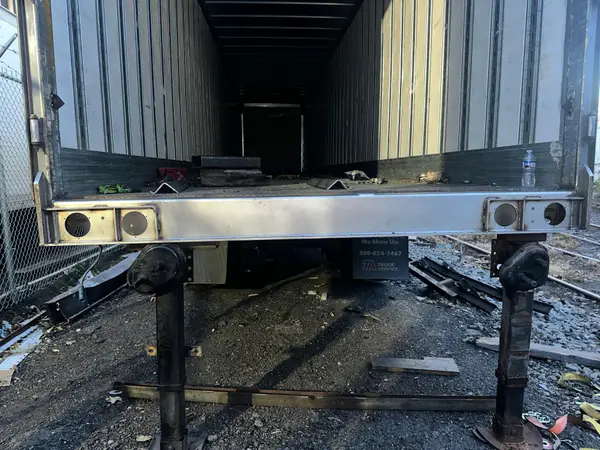
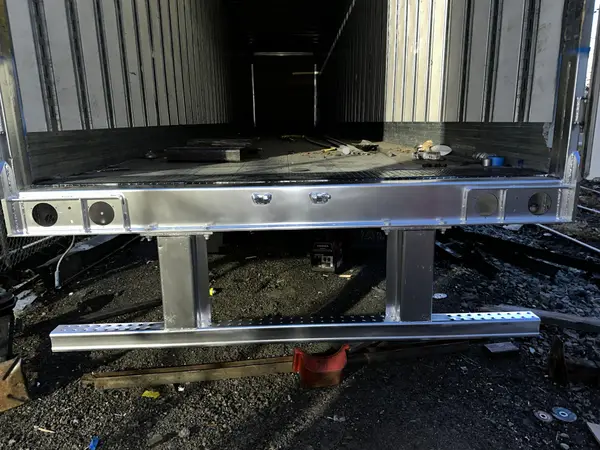
  1. Rear straight-on, doors open: sill dented/scraped, threshold plate bowed up, ICC step bar bent down at center, left inner light lens broken. 1 Before
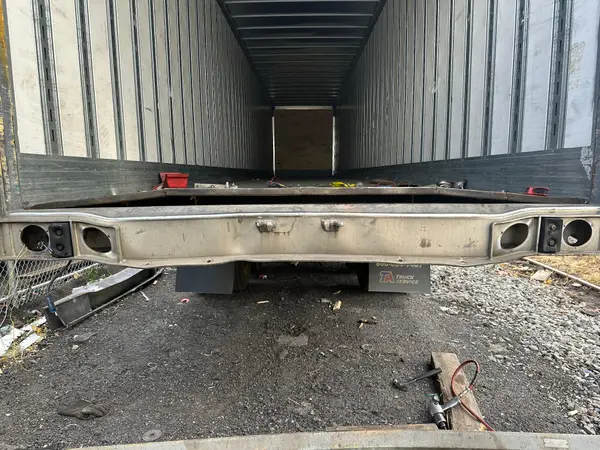
  2. All tail lights removed (empty housings), ICC bar gone, air tool and hammer on the ground. 2 Teardown
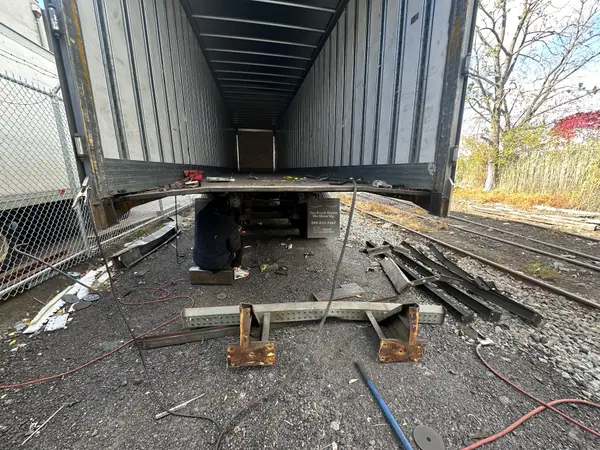
  3. Worker kneeling under the rear on the sill; removed ICC assembly on stands in the foreground. 3 Teardown
  4. Bright new sill beam fitted across the rear, light holes empty, loose wiring hanging. 4 In progress
  5. Second angle of the new sill in place at dusk, wiring not yet connected. 5 In progress
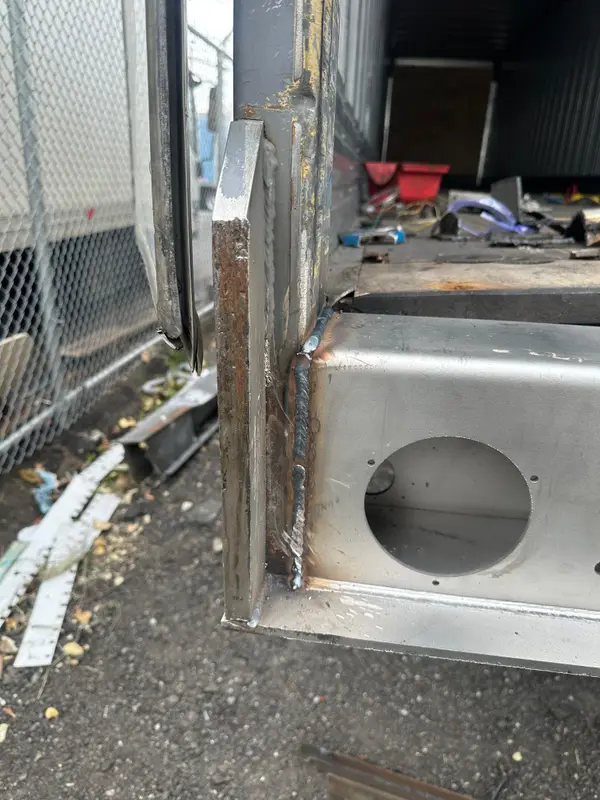
  6. Left rear corner close-up: fresh weld bead joining the new sill's light box to the rear post. 6 In progress
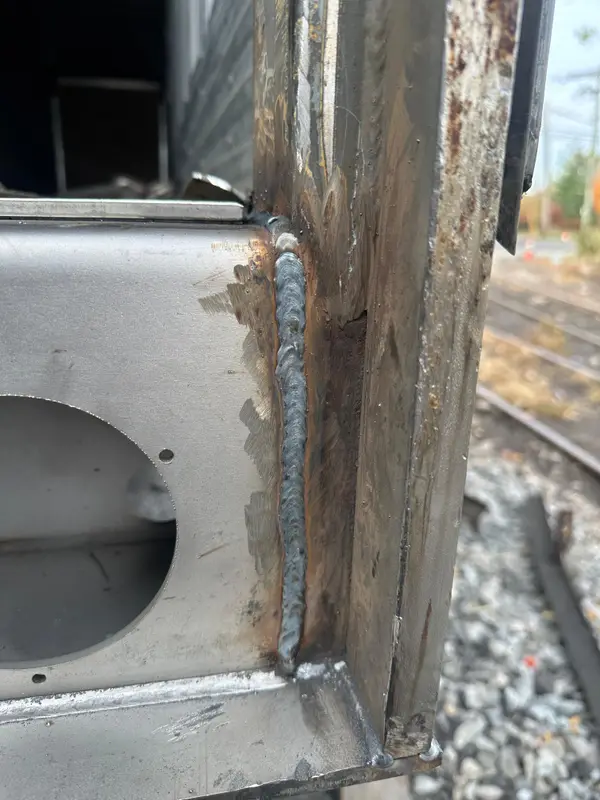
  7. Right rear corner close-up: matching fresh weld bead, heat discoloration on the steel. 7 In progress
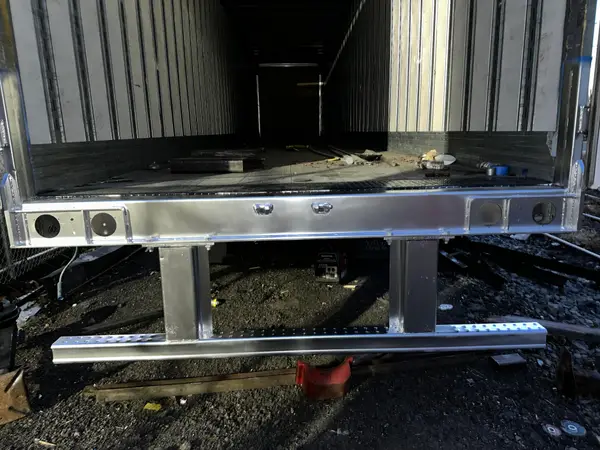
  8. Full rear in daylight: new sill fully welded across, light housings still empty, no ICC yet. 8 In progress
  9. Wider second angle of the welded-in sill, same state. 9 In progress
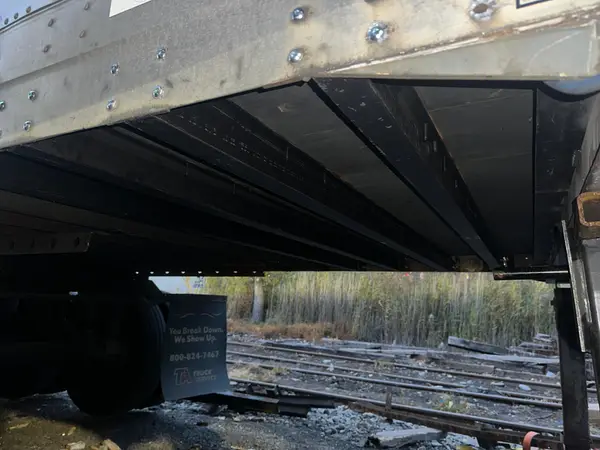
  10. From underneath: new black crossmembers / floor supports under the rebuilt sill; TA mudflap confirms the unit. 10 In progress
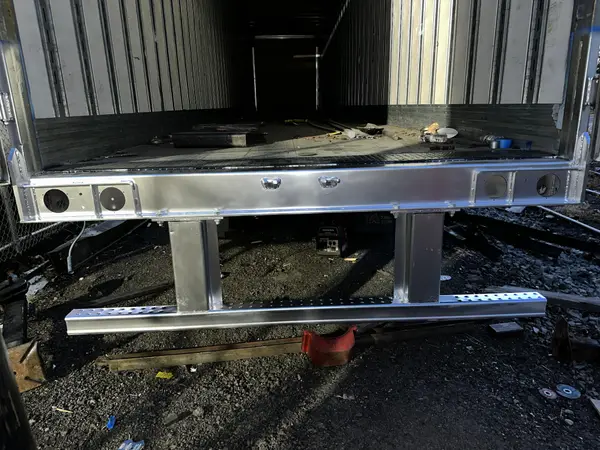
  11. New ICC uprights and step bar fitted under the new sill; lights, tape and plate not yet installed. 11 In progress
  12. Second frame of the fitted ICC, same unfinished state. 12 In progress
  13. Third frame of the fitted ICC/sill assembly before finishing. 13 In progress
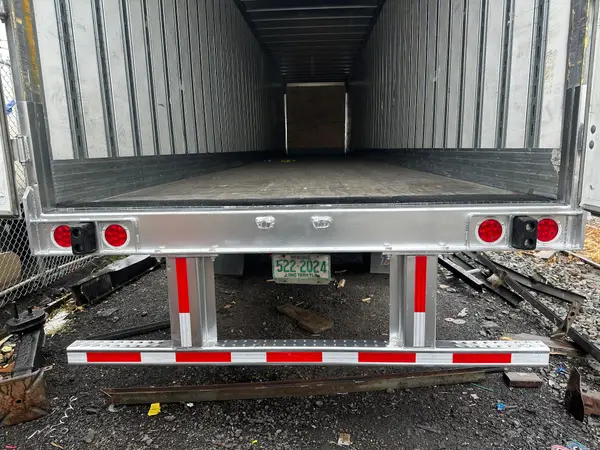
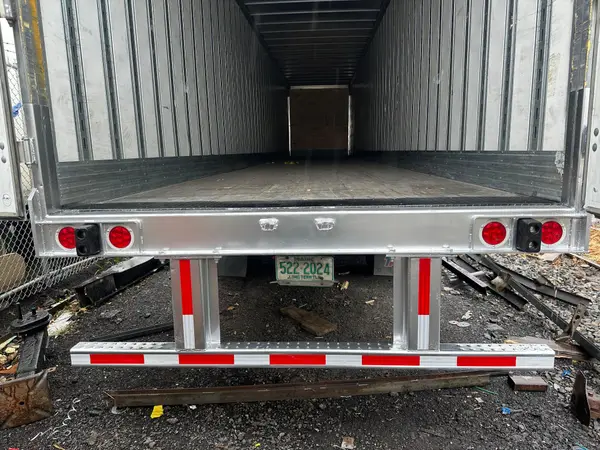
  14. Doors open: rebuilt sill with new red tail lights, new ICC with fresh red/white conspicuity tape. 14 Finishing
  15. Second frame of the finished rear, doors open, plate legible. 15 Finishing
  16. Low close-up from inside the box: new wood floor/threshold meets the new sill. 16 Finishing
  17. Doors closed showing CHAMPION SE badge; new sill, lights, ICC with fresh tape. 17 After
  18. Second doors-closed frame of the completed rear. 18 After
  19. Wide full-rear shot of the finished trailer, Champion logo and plate visible. 19 After
  20. Left rear corner / side angle: new corner lights and ICC tape detail. 20 After
  21. Right rear corner close-up under the CHAMPION SERIES badge: new LED tail lights, ICC step with fresh tape. 21 After

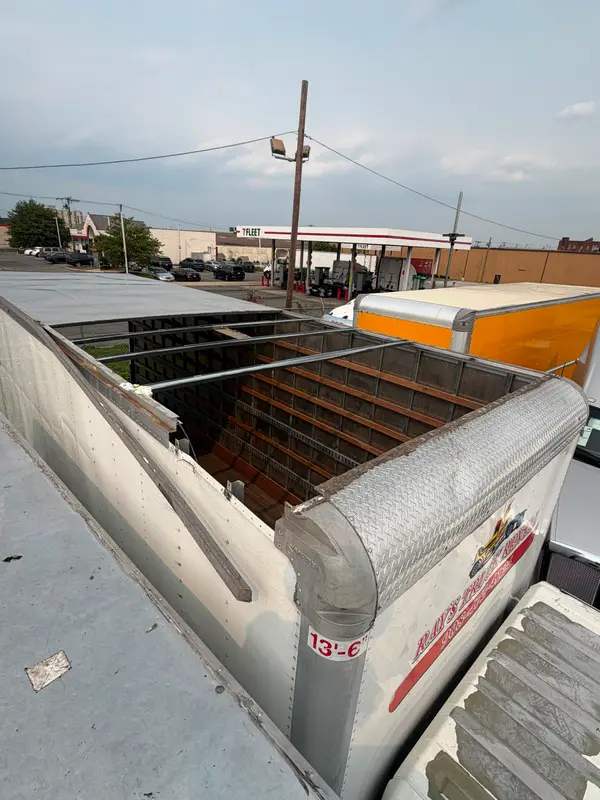
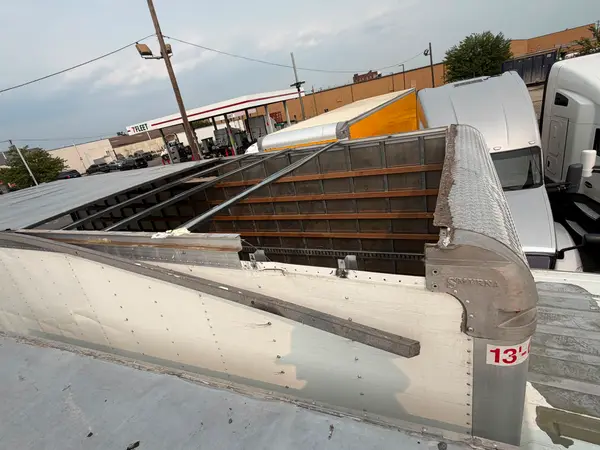
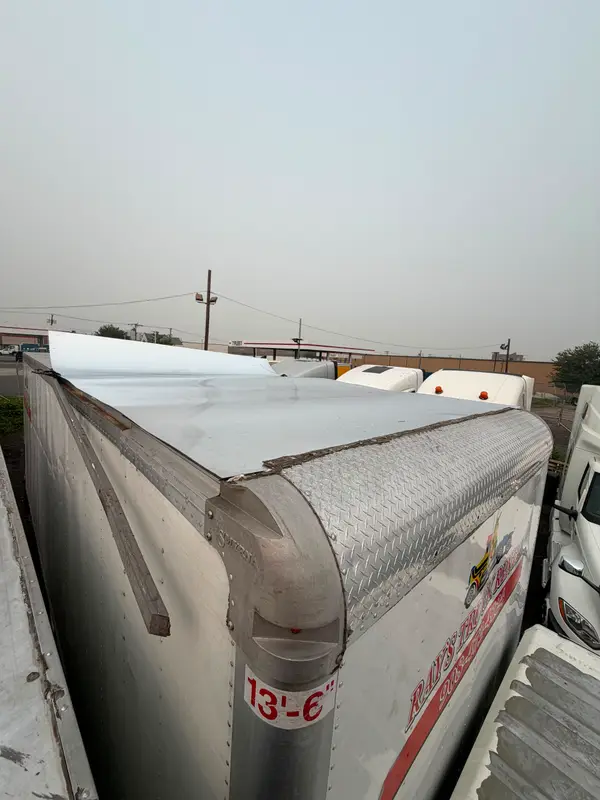
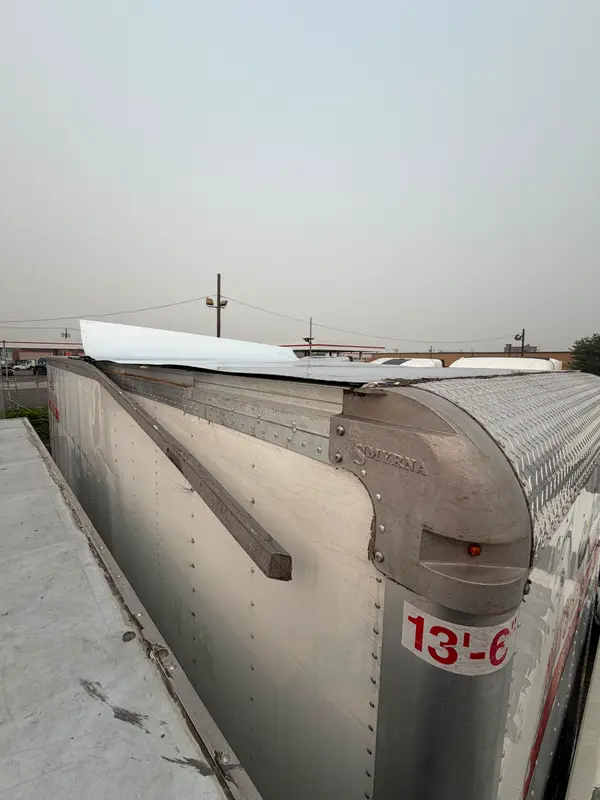
Ray's Truck Rental: full roof replacement

July 15–25, 2026 · 27 steps

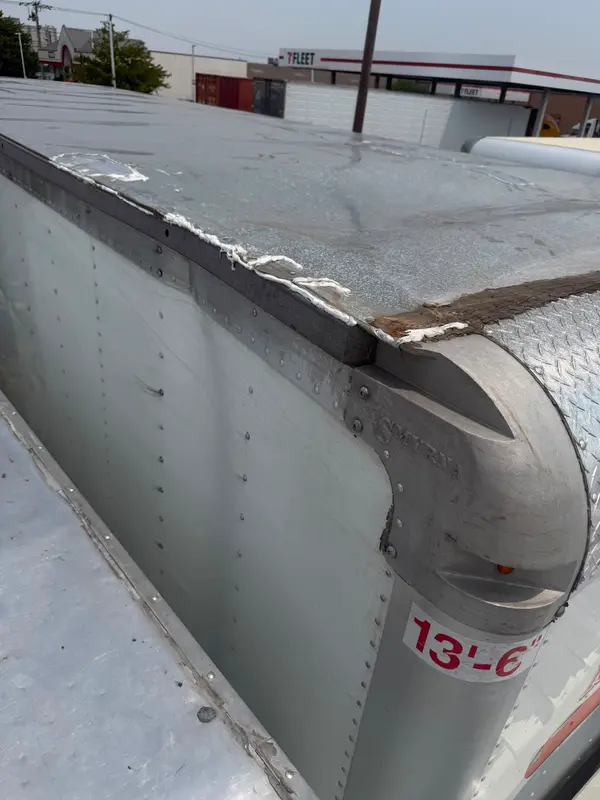
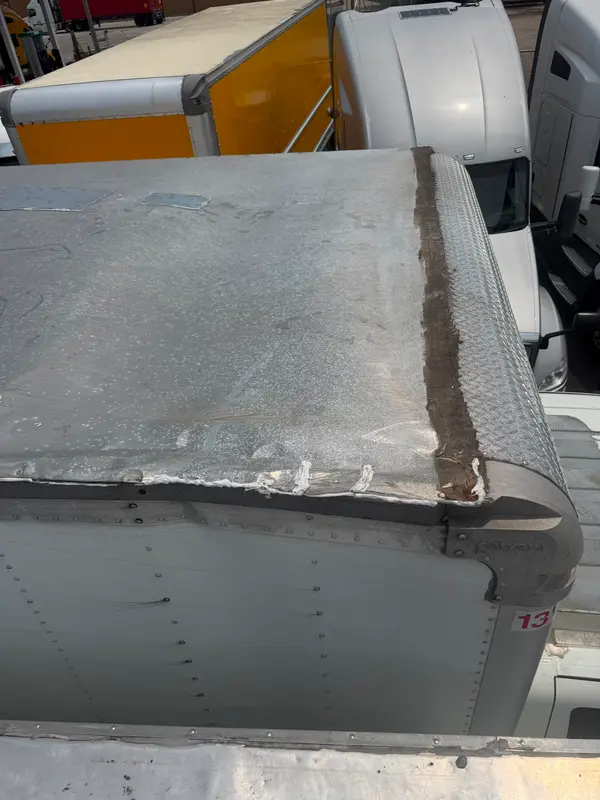
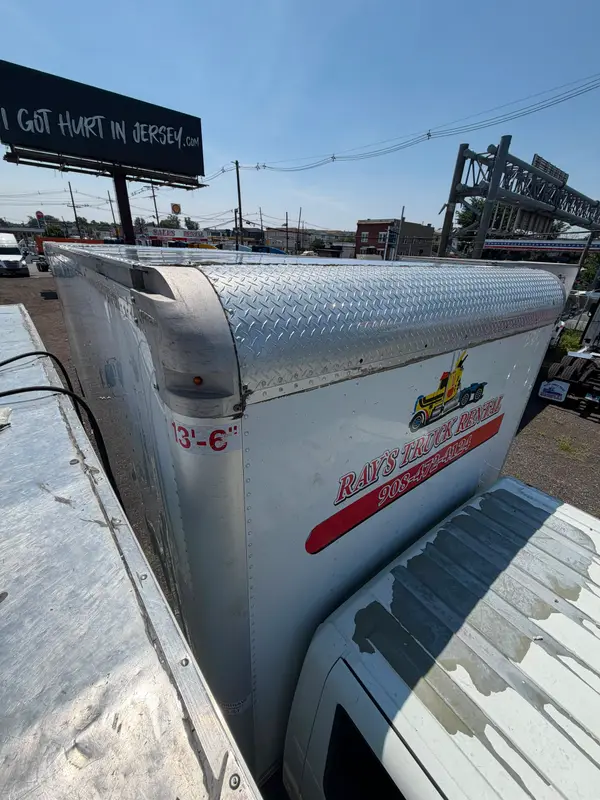
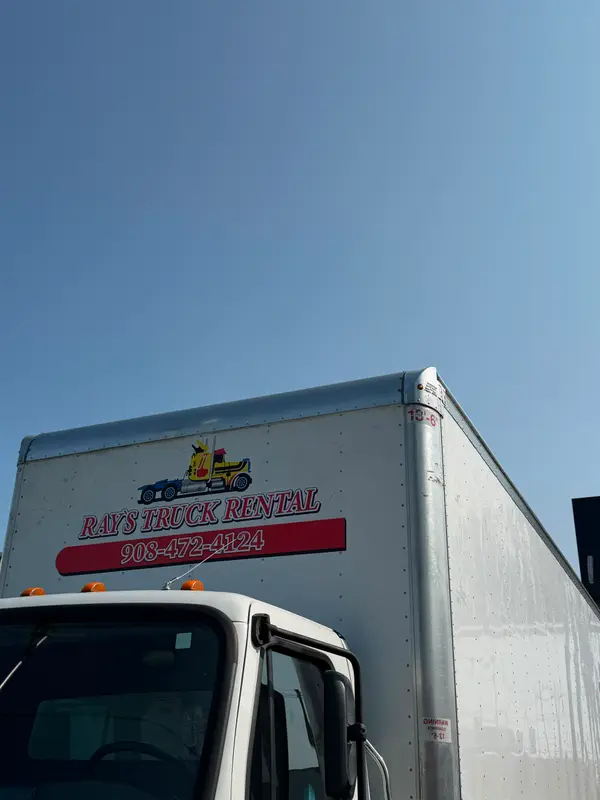
  1. Front corner: roof-edge sealant failed/peeling, 13'-6" sticker and diamond-plate nose visible. 1 Before
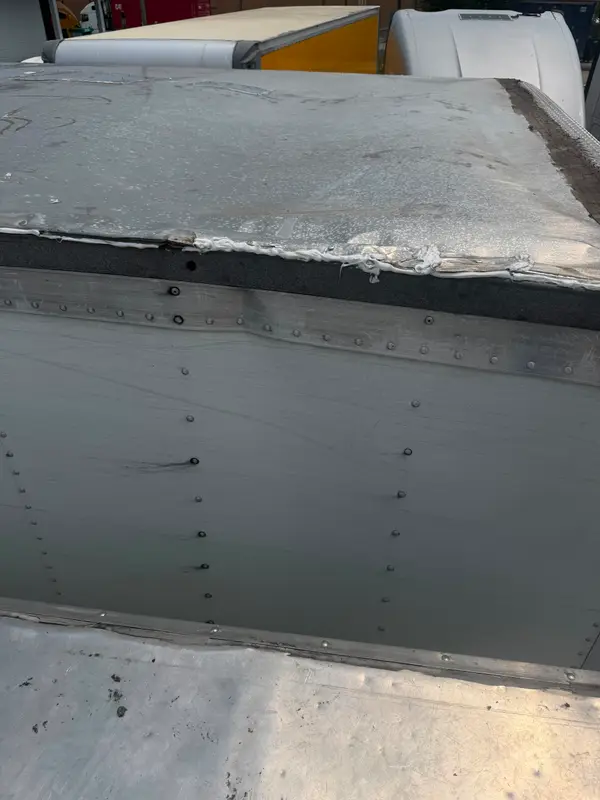
  2. Roof top/side edge: deteriorated, cracked sealant along the roof rail. 2 Before
  3. Front roof and diamond-plate nose from above; rust streak at the cap joint. 3 Before
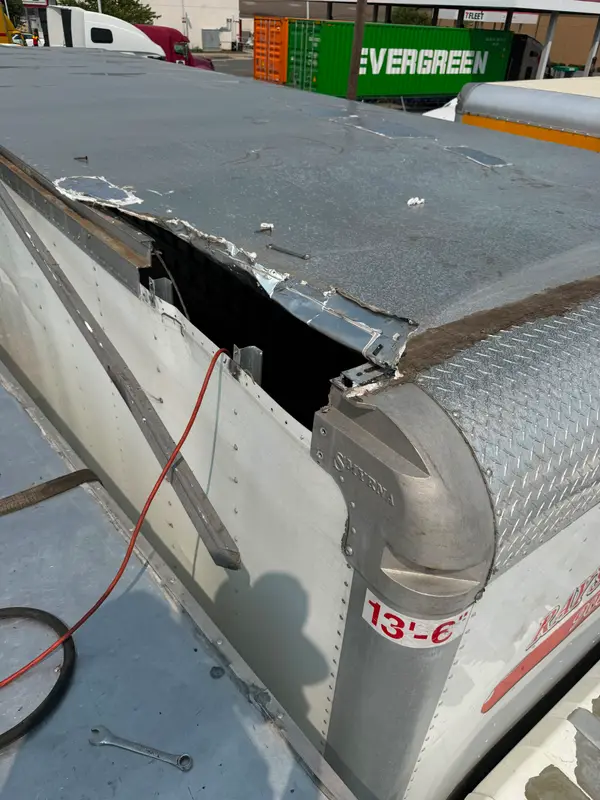
  4. Roof torn open with a large hole at the front corner, 13'-6" sticker, Ray's livery. 4 Before
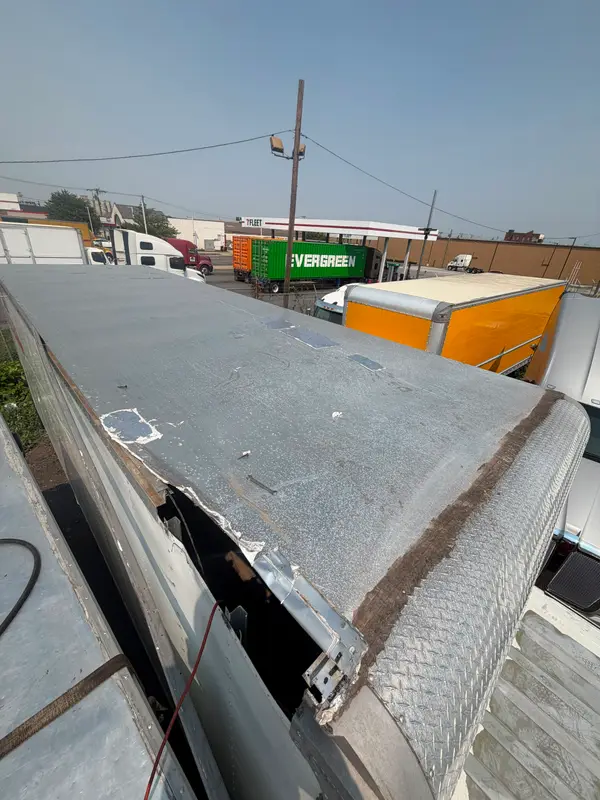
  5. Wide length view of the whole roof with the corner hole, diamond-plate nose at right. 5 Before
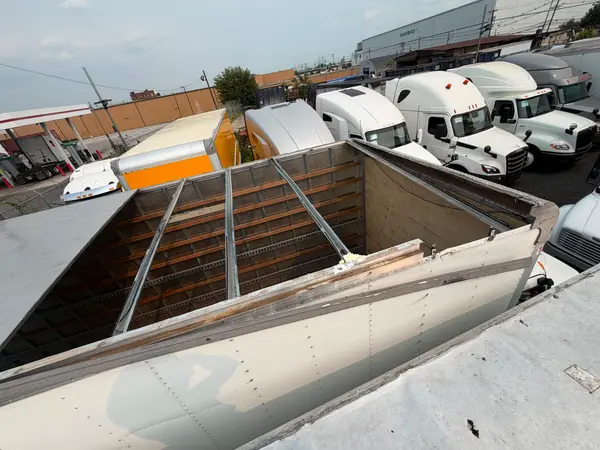
  6. Roof skin removed, bows exposed; wood-slat interior lining visible. 6 Teardown
  7. Stripped to the bows from the front corner; Ray's logo and 13'-6" sticker on the nose. 7 Teardown
  8. Stripped bows close-up, Smyrna corner cap and 13' sticker. 8 Teardown
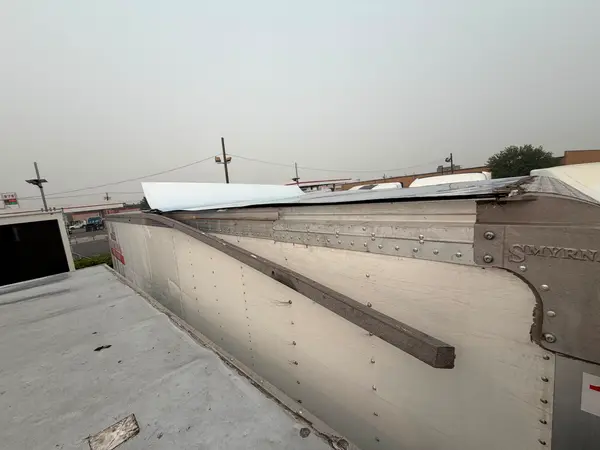
  9. New white roof sheet on, front end still curling up unfastened. 9 In progress
  10. Same moment from the side: sheet laid over the bows, leading edge lifted. 10 In progress
  11. Side view down the box: new sheet curling at the front, Smyrna cap at right. 11 In progress
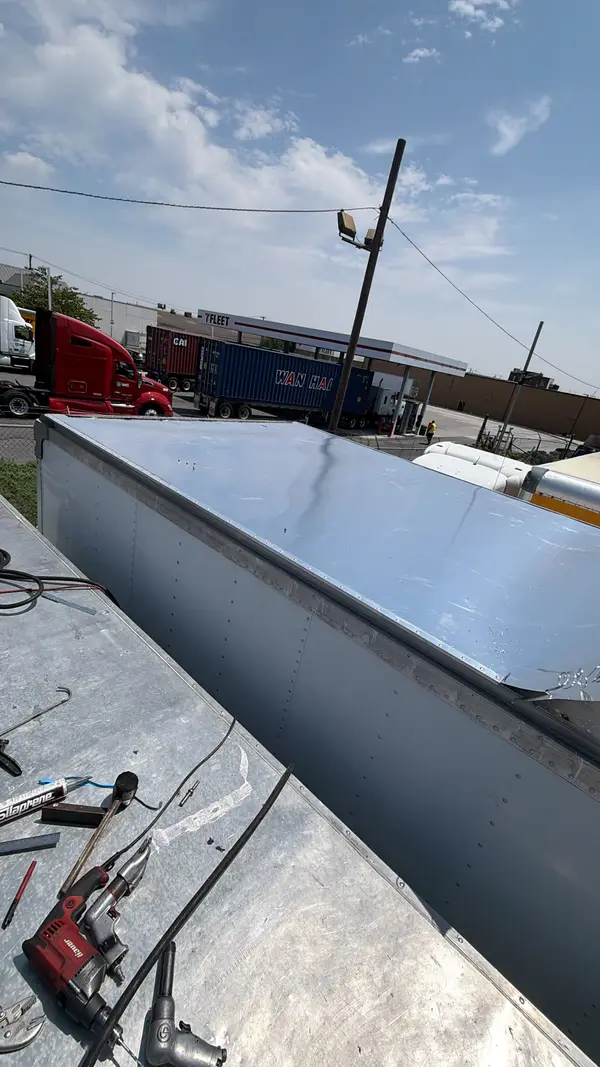
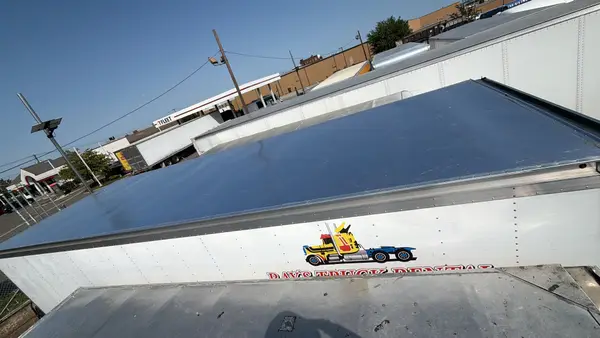
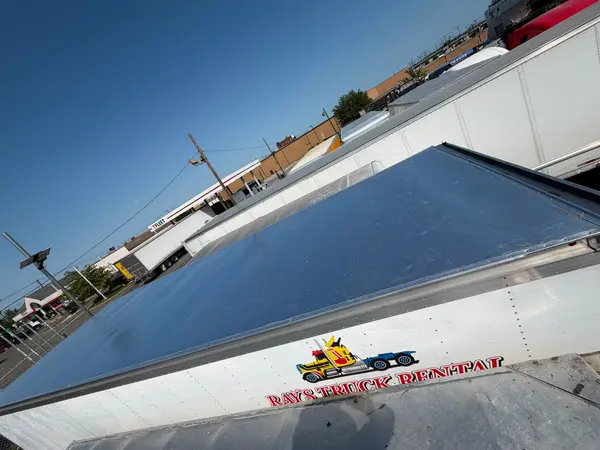
  12. New mirror-finish roof, full side length. 12 After
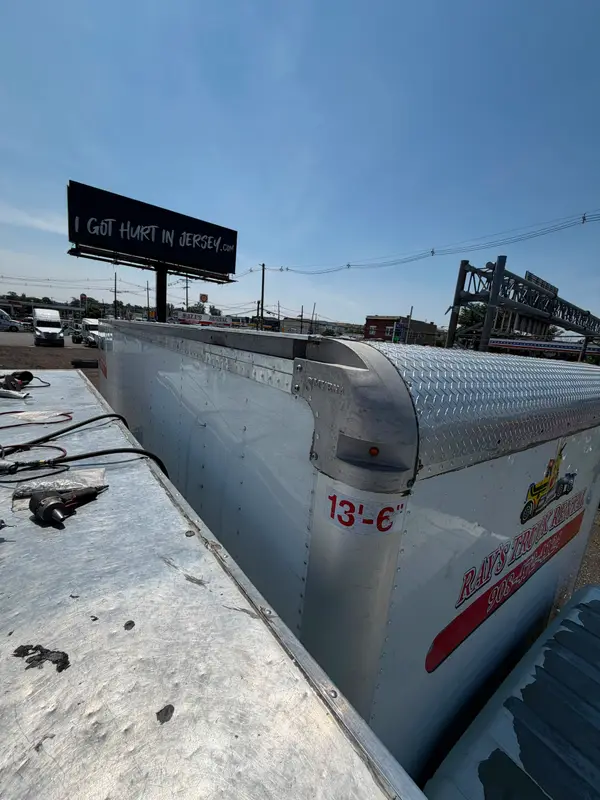
  13. New roof fitted, seen from the nose; 13'-6" sticker and Ray's logo. 13 After
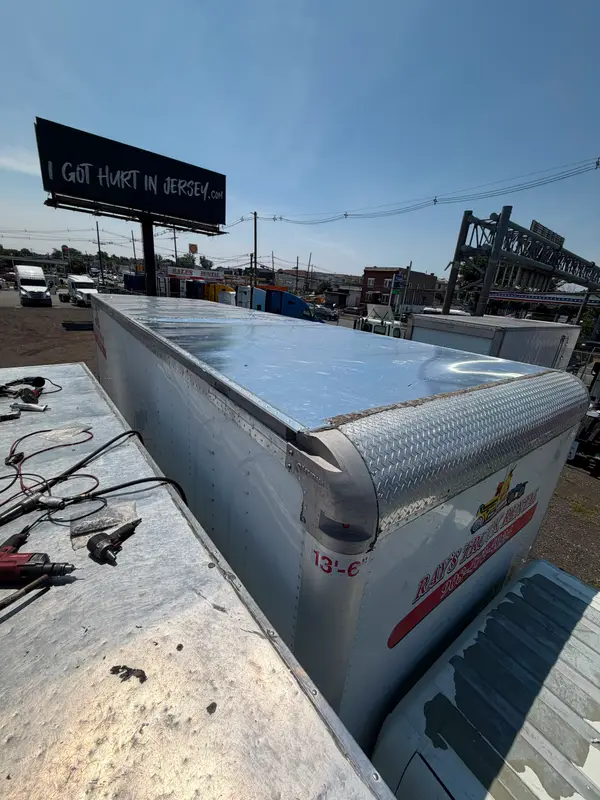
  14. Nose-corner close view: new roof, diamond-plate cap, "RAY'S TRUCK RENTAL" legible. 14 After
  15. Front corner and diamond-plate nose with the full Ray's Truck Rental logo. 15 After
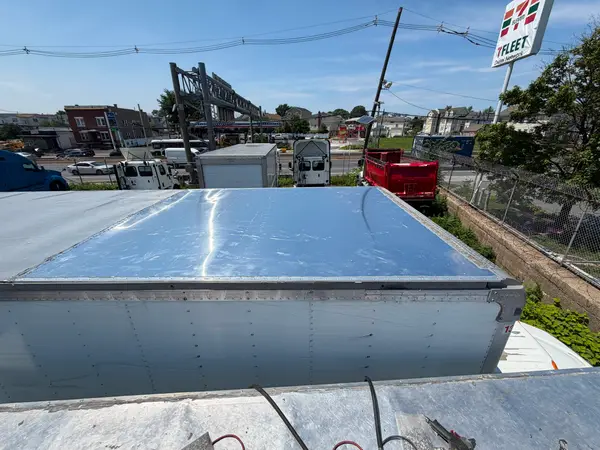
  16. Top-down wide shot of the brand-new mirror-finish roof. 16 After
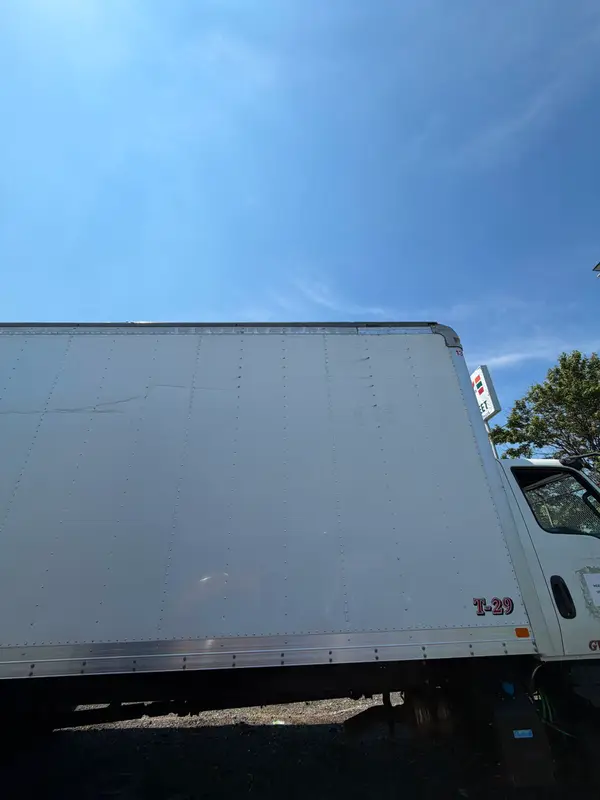
  17. Ground side view of the finished truck; fleet number T-29 at the rear of the box. 17 Same truck
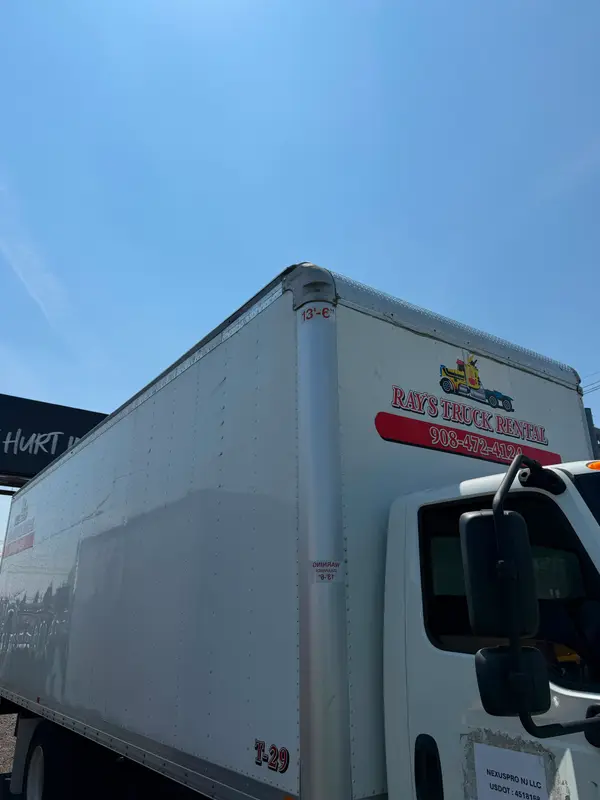
  18. Ground three-quarter front view: Ray's livery, 13'-6" on the corner post, T-29 on the side. 18 Same truck
  19. Looking down into the rear corner: new rail/seam in progress, slat interior and new shiny ceiling visible. 19 Finishing
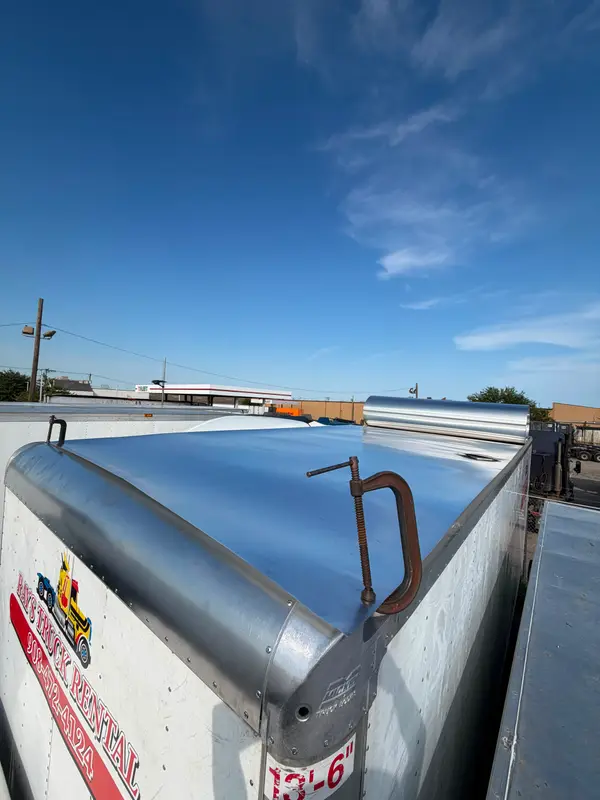
  20. Front roof with a C-clamp still on the new skin, roll of roof material behind. 20 Finishing
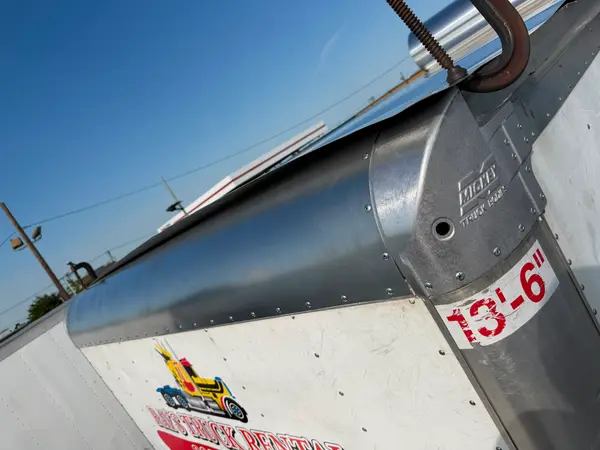
  21. New Mickey corner cap and roof edge, 13'-6" sticker, Ray's logo, clamp still in frame. 21 Finishing
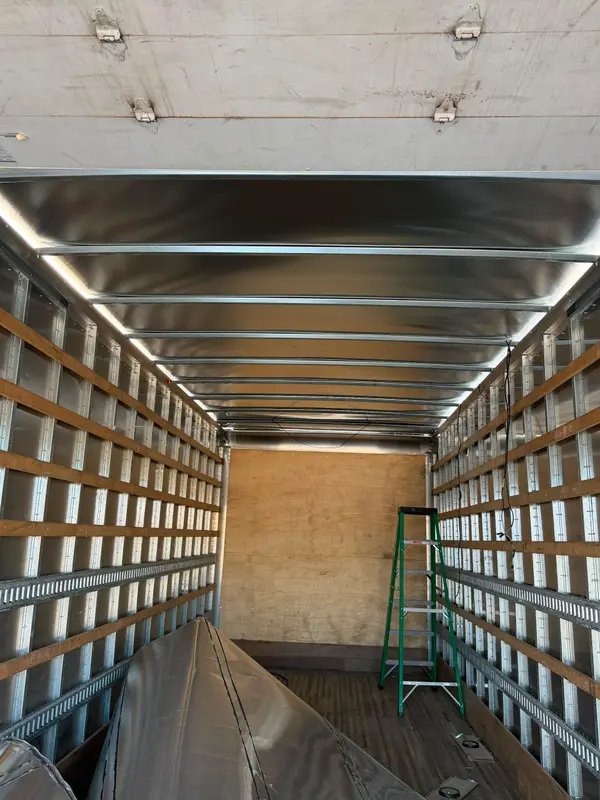
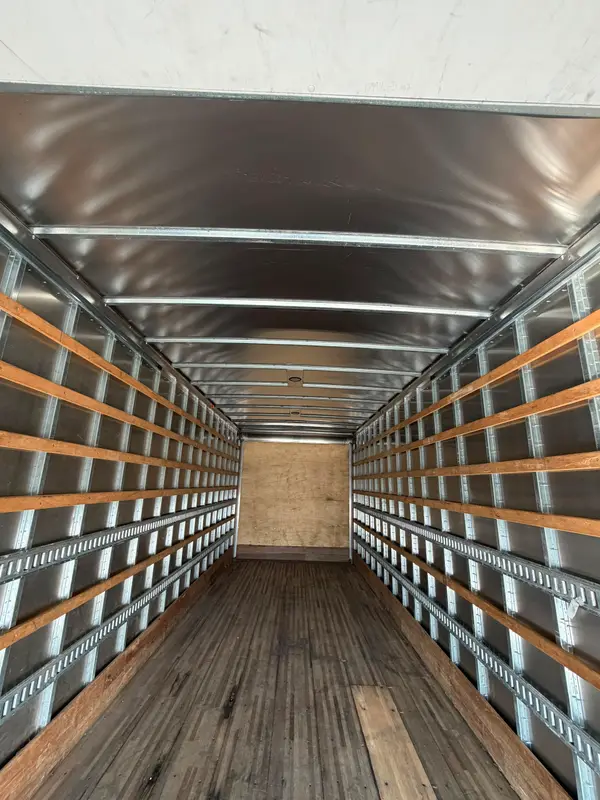
  22. Inside the box: brand-new shiny ceiling panels and bows finished, wood-slat walls, old roof sheet on the floor. 22 Finishing
  23. Top view of the finished mirror roof, Ray's logo on the side below. 23 After
  24. Wide top view of the finished roof, "RAY'S TRUCK RENTAL" legible. 24 After
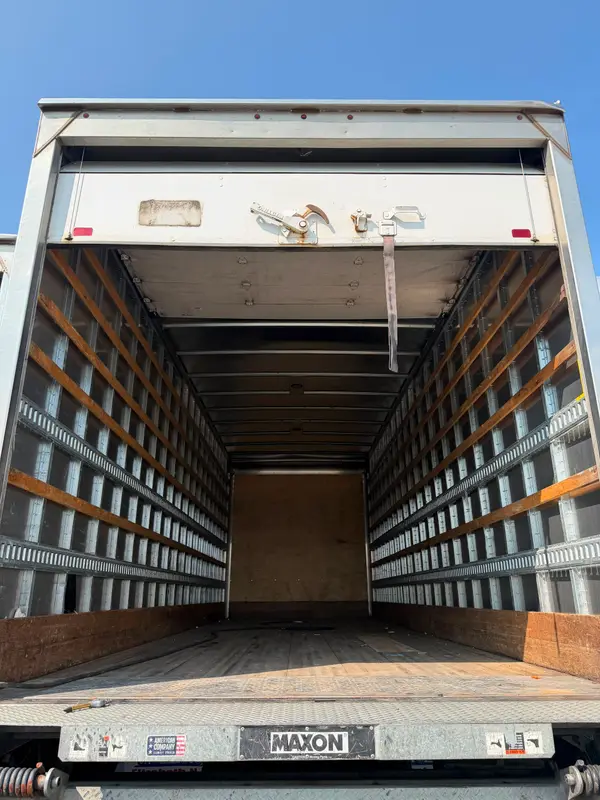
  25. Rear open: roll-up door, MAXON liftgate, wood-slat interior and new ceiling. 25 Same truck
  26. Interior: finished shiny ceiling and bows, slat walls: the completed version of step 22. 26 After
  27. Ground front view over the cab: Ray's logo and 13'-6" mark, new roof rail above. 27 Same truck

International box truck: side wall and roof rebuild

March 23–27, 2026 · 6 steps

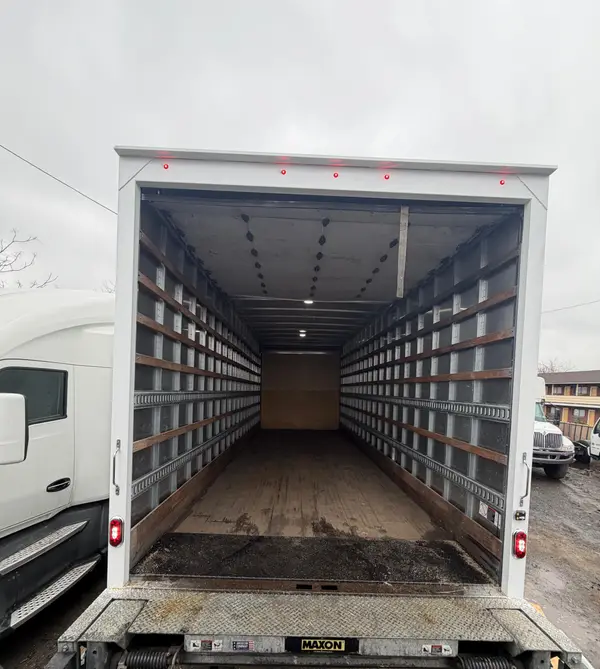
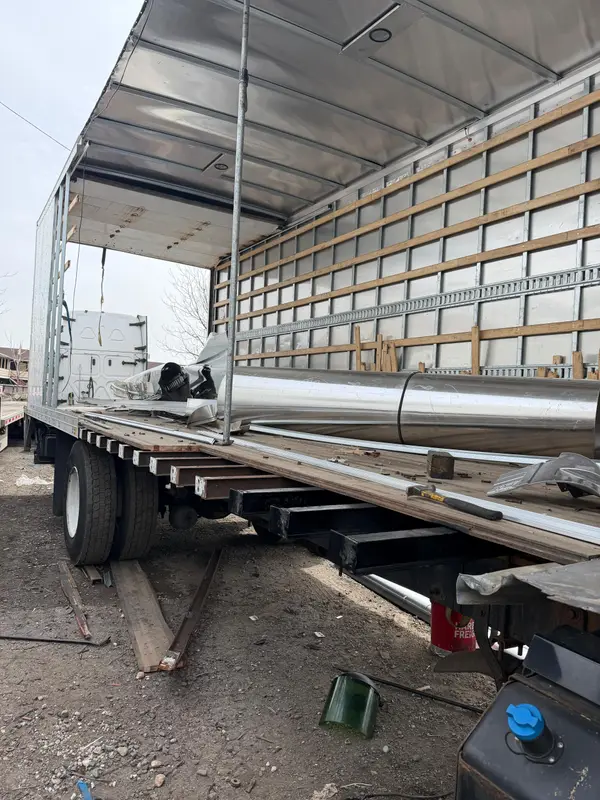
  1. Rear view into the box before work: slat walls with wood rub rails + E-track, plywood front wall, wood floor, MAXON liftgate: 11 minutes before the wreck exterior. 1 Before
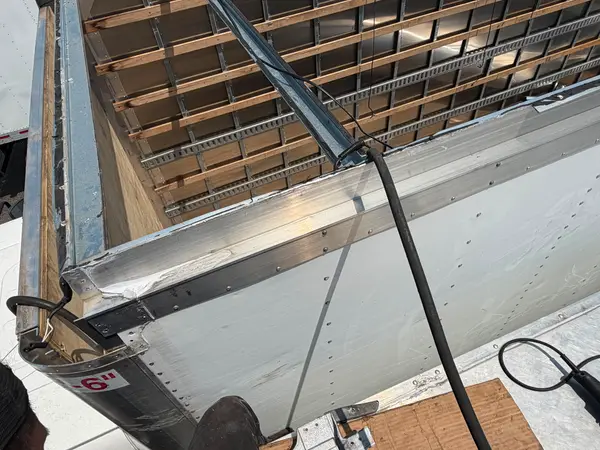
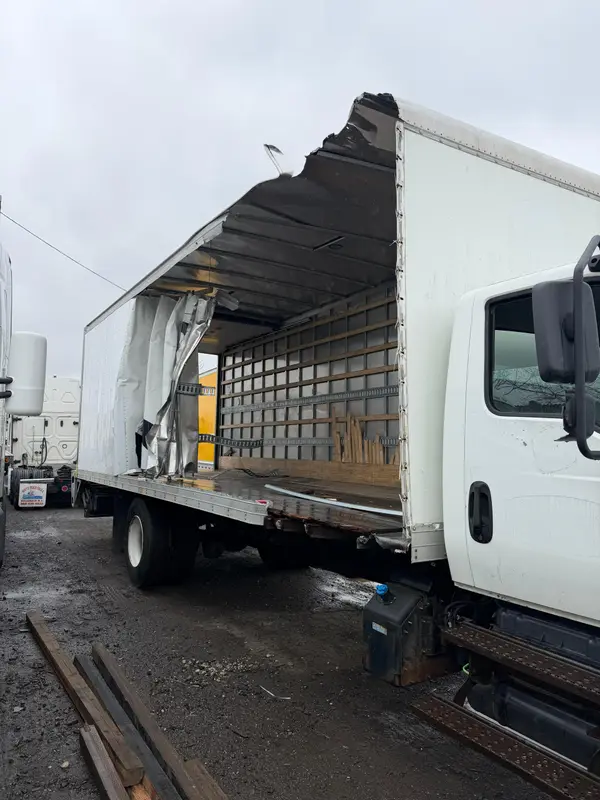
  2. Entire side wall torn open and roof peeled/crushed at the front corner; white MV cab, black battery box with blue cap, timbers on the muddy ground. 2 Before
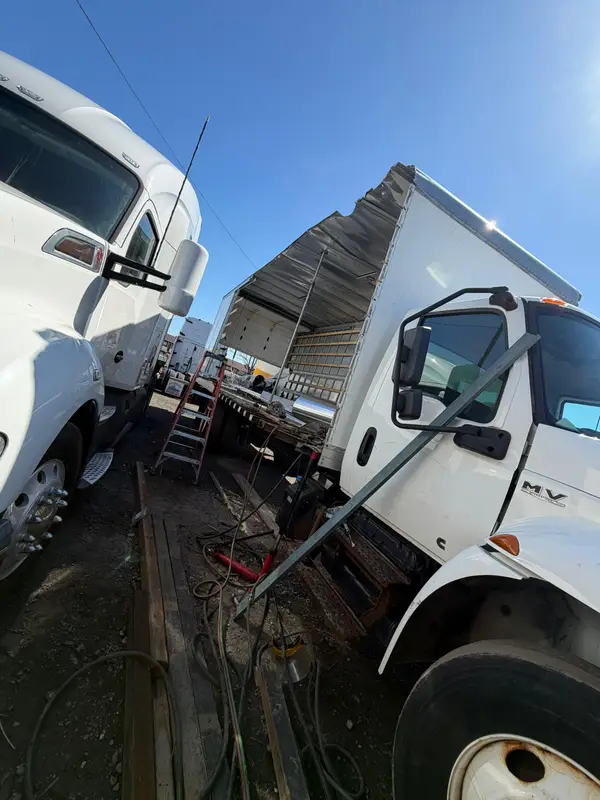
  3. Same cab in the same spot: side skin fully stripped, roof skin peeled up and propped on a pole, welder leads and cables on the ground. 3 Teardown
  4. Open side: floor and crossmembers bare, a roll of new roof sheeting lying on the floor, roof held on a prop pole; black tank with the same blue cap in frame. 4 In progress
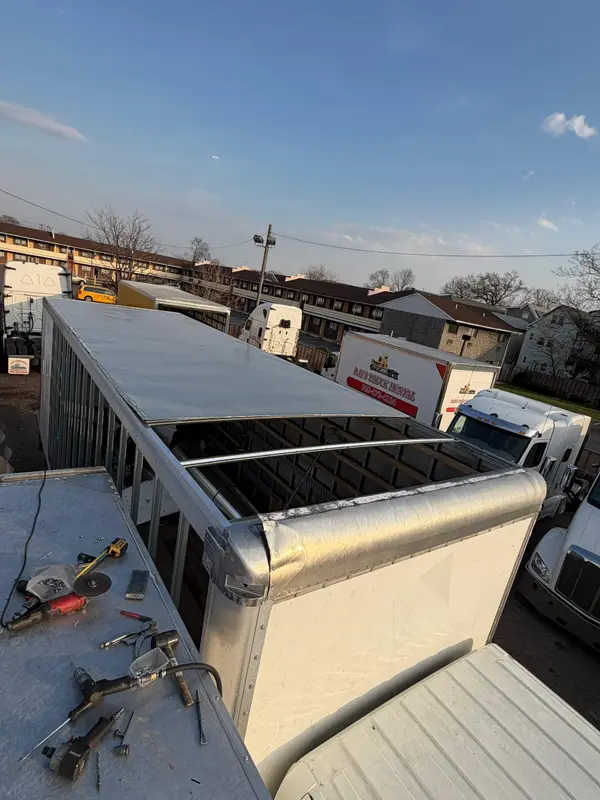
  5. New roof sheet half-laid over open bows, brand-new polished front corner cap fitted at the nose, slat interior visible through the open roof. 5 In progress
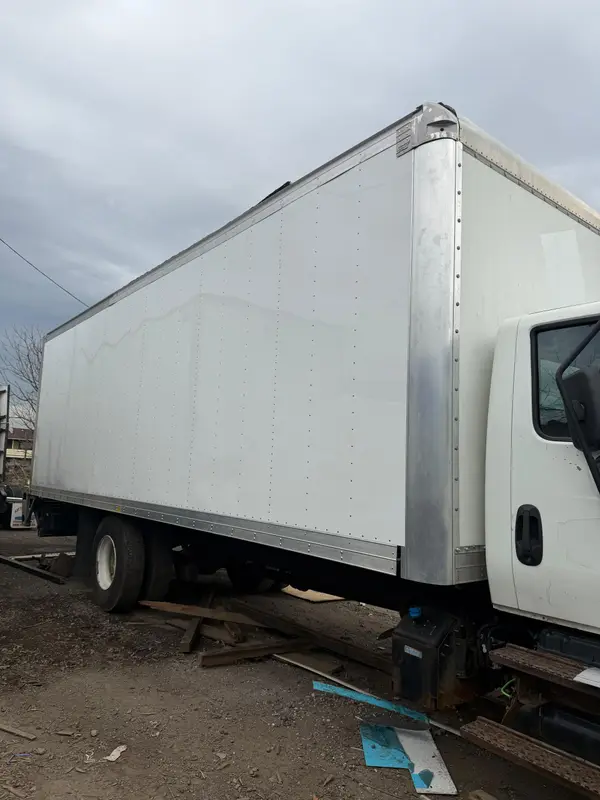
  6. Same angle and spot as step 2: side rebuilt with gleaming new white panels and a new polished front corner post; same cab, battery box, steps and timbers. 6 After

The full catalog — one file

PDF, 3.9 MB

Download

Need work like this on your trailer? Contact us

Call Text